Adding Item Modifiers (Upcharges, Damages, Materials, Patterns & Designers) to Items
Adding upcharges to items is a two-step process.
First upcharges are added as Item Modifiers, then they are applied to each item. In this example, we will be adding a “Hand Pressed” upcharge to an item.
- From the Item and Price section, select the Item Modifiers button. It is located in the upper-right part of the screen.

- The modal will open, and you will see a list of Item Modifiers. Note the drop-down near the top of the modal. It contains the different types of modifiers the system supports. In that Drop-down you will find Damage, Designer, Extra, Material & Pattern. In this example, we are adding a “Hand Pressed” upcharge, so we select the Extra category.

- In the Extra category of modifiers, type “Hand Pressed” in the textbox and then press the green Add (+) button.

- Once the Modifier is added, it will appear in green on the list. Now that the “Hand Pressed” upcharge is included in the Extra category, it can be applied as an upcharge to individual items.

- Next, navigate to the item to which you wish to apply the Upcharge. In this example, we are going to be applying the upcharge to a Dress Shirt. So, I select the Shirt Category from the Category drop-down and then find the row for Dress Shirt. In the item row, click on the number under the Upcharges column.

- Another modal will appear, similar to the one we saw previously. Note that Dress Shirt is already selected for us from the drop-down menu.

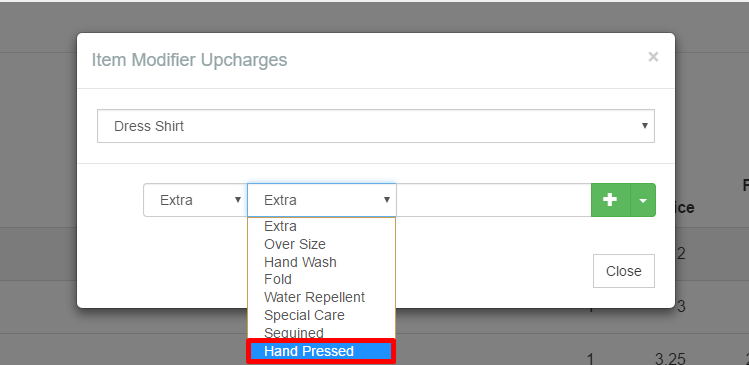
- In the Modifier Category drop-down are all of the Modifier categories that we had seen in Step 2. In this example, we added the “Hand Pressed” upcharge to the Extra category, so we select it.

- In the Modifier menu, we find all the modifiers added to the selected category. In this case, we are seeing all the modifiers under the Extra category. In this list, we find the modifier that we just added, “Hand Pressed”, and we select it.

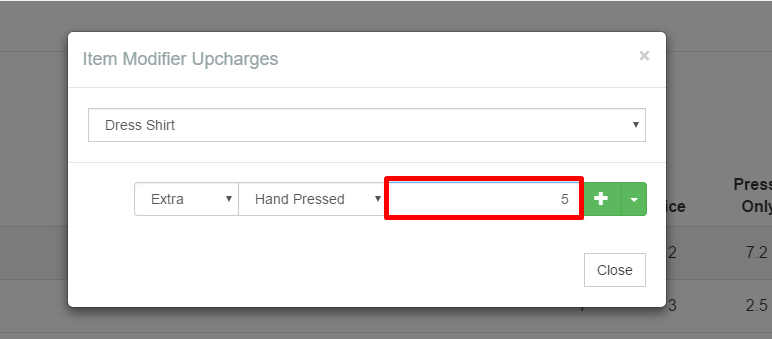
- Next we add the amount we want to charge for this upcharge and enter it in the textbox to the right of the modifier drop-down menu. In this example, we will use $5.00 as our charge.

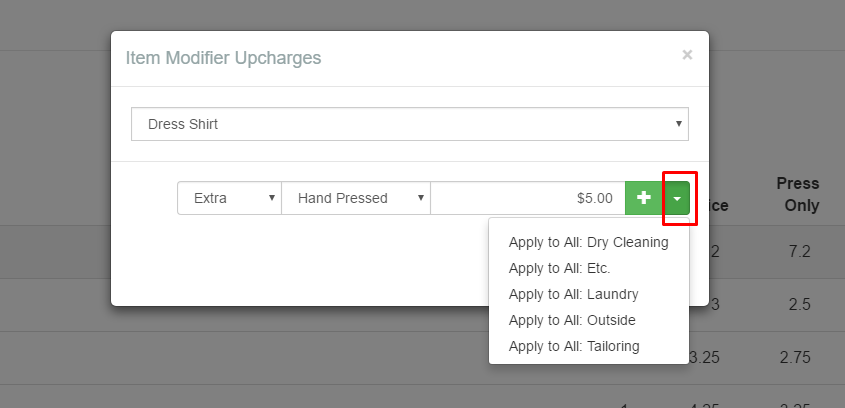
- Once the category, modifier, and price have been added for the selected item, to add the upcharge to the selected item, simply press the green _Add (+)_button. If we wanted to add this upcharge to multiple items in a given service type, for example, all dry cleaning items, we could click the green drop-down arrow to the right of the Add (+) button and select Apply to All: Dry Cleaning. However, in this example, we will just add the upcharge to the Dress shirt by pressing the green Add (+) button.

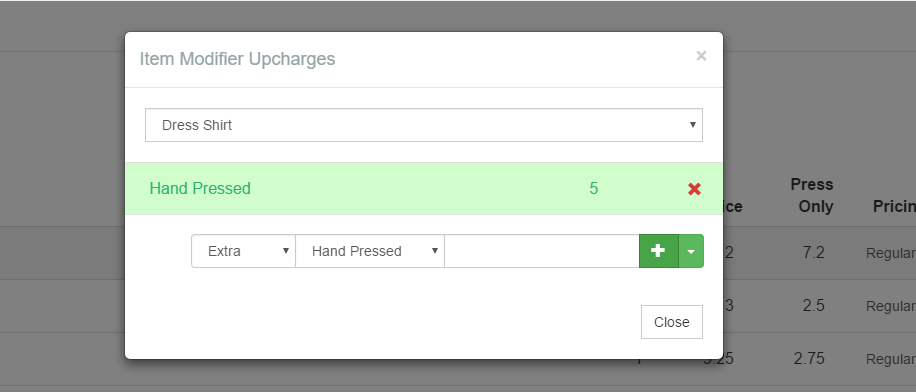
- After pressing the green _Add (+)_button, the item is added to the Dress Shirt modifier list in green. Now this upcharge has been successfully applied to the item and it will appear when users press the Upcharges button for this item when creating Invoices.

- The last thing to note is that once an upcharge is added you can see the how many up charges an item has by the number shown in the Upcharges column. We added 1 upcharge (Hand Pressed) to the Dress Shirt item. So, the Upcharges column shows a 1 for that item.
