From the Billing section, you are able to apply for Credit your customers have accumulated or issue them credit through overpayments. This guide will cover how to pay with available credit and how overpayments get added as credit for customers.
If you are looking for a guide on how to apply for payments without an integrated payment processor, see this article: https://darkposkb.groovehq.com/help/batch-billing-non-integrated-payment-processor-payments.
If you are looking for how to apply for credit card payments with an integrated payment processor, please see this article: https://darkposkb.groovehq.com/help/batch-billing-credit-card-payments-with-integrated-payment-processor
- Overpayments and Credit
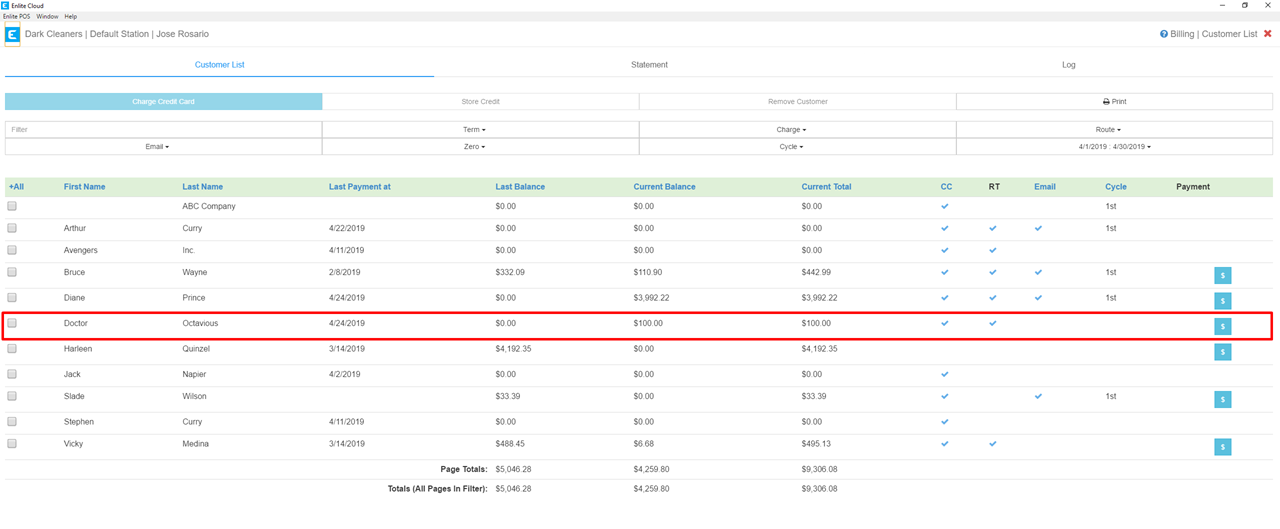
In our example below, Mr. Octavious owes $29.40 (Pic 1.1). Let’s say he sends us a check for $129.40, an overpayment of $100.00. We apply the check in the system for the full amount (Pic 1.2). When an overpayment is applied, the system will automatically take the overpaid amount and apply as credit for the customer. Refer to the articles above if you are unsure how to apply for payments. The payment is applied and Mr. Octavious’ balance shows as $0.00 because he no longer owes us money (Pic 1.3). Let’s look at what happened to the $100.00 overpayment in the next step.
Pic 1.1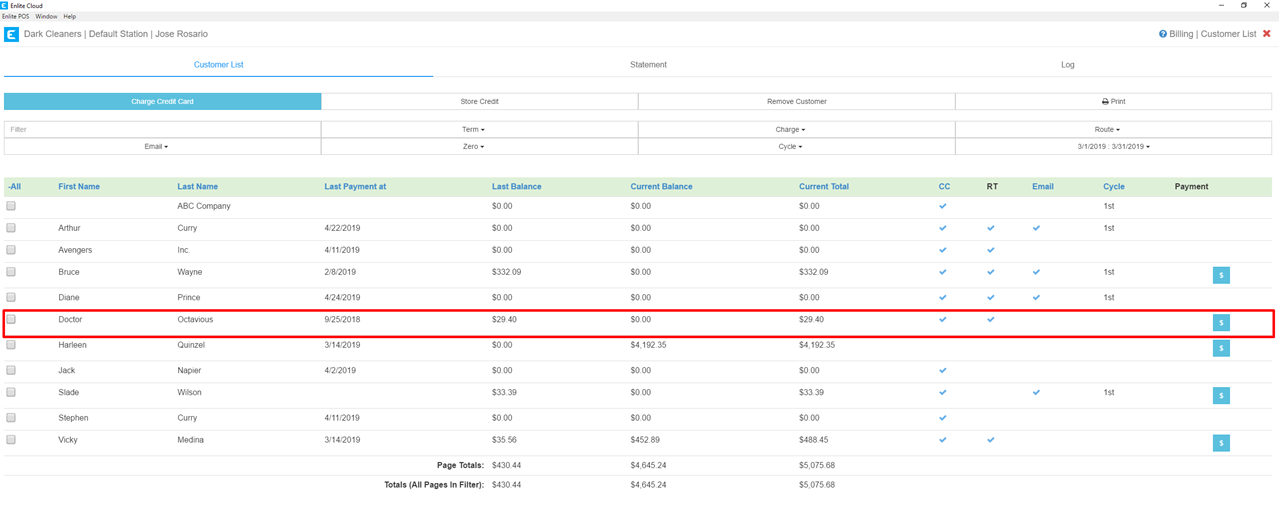
Pic 1.2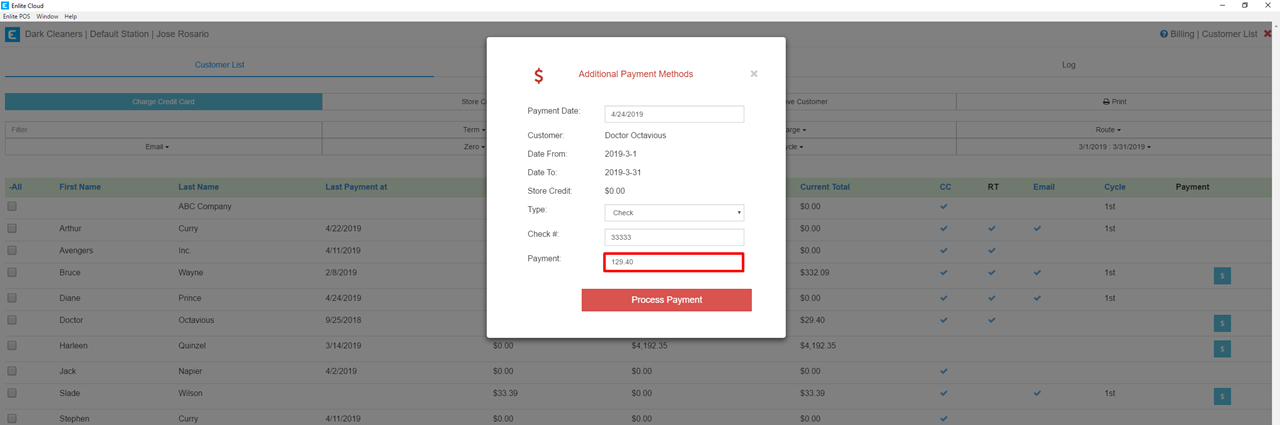
Pic 1.3
- Viewing the Credit
The $100.00 overpayment credit can be viewed in 2 different places. The first is the Payment History section (Pic 2.1), which is used to view or void payments (https://darkposkb.groovehq.com/help/how-to-void-payments). Note that the overpayment can be voided like any other payment.
The other section where the overpayment credit can be viewed is the Credit History section in the Customer’s Information (Pic 2.2). If you are unfamiliar with this section, please refer to its article (https://darkposkb.groovehq.com/help/issuing-store-credit). The Credit History tab will show the Deposit record, with the amount, date, and employee who created it.
Pic 2.1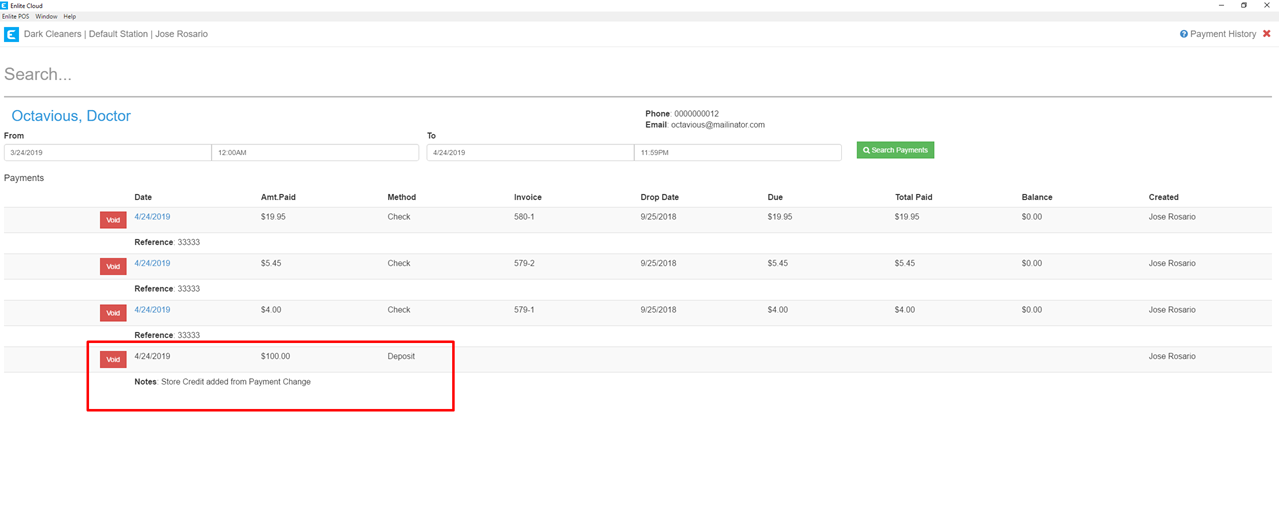
Pic 2.2
- Applying Available Credit Individually
There are 2 ways to apply available credit to invoices. In our example below, Mr. Octavious now owes us $200. The first step is to click the little blue payment box in his customer record (Pic 3.1).
The modal that appears, shows us that Mr. Octavious has $100 in credit. To use these funds, we press the Apply button (Pic 3.2). After that, you can specify the amount of Credit that will be used. In this case we will be applying $50. Once that is entered press the Process Credit button (Pic 3.3).
After processing the credit, the balances will recalculate and now Mr. Octavious only owes us $150 (Pic 3.4).
Pic 3.1
Pic 3.2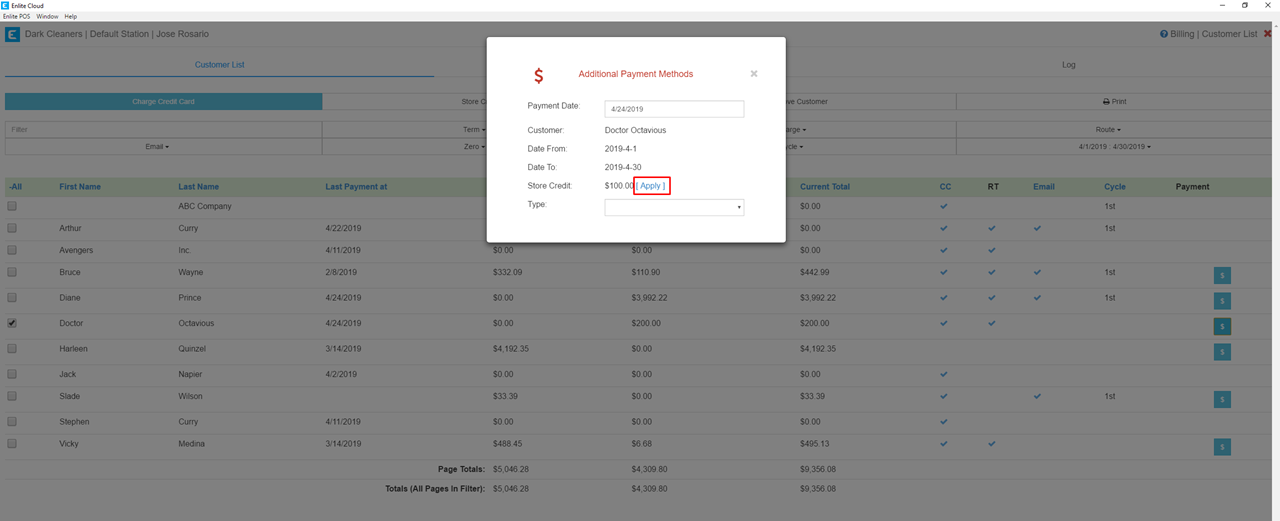
Pic 3.3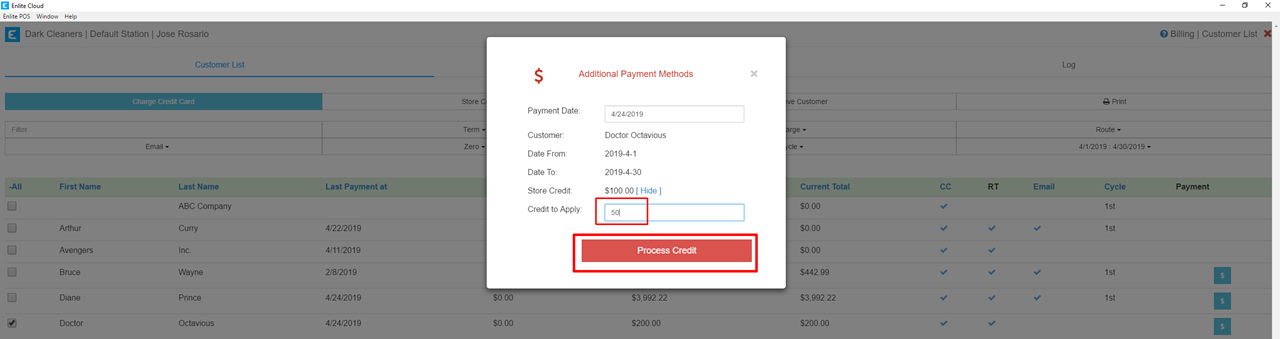
Pic 3.4
- Viewing the Payments
The store credit payments can be viewed in both the Payment History (Pic 4.1) and the Credit History section (Pic 4.2). Note that the Credit payment can be voided, like any other payment.
Pic 4.1
Pic 4.2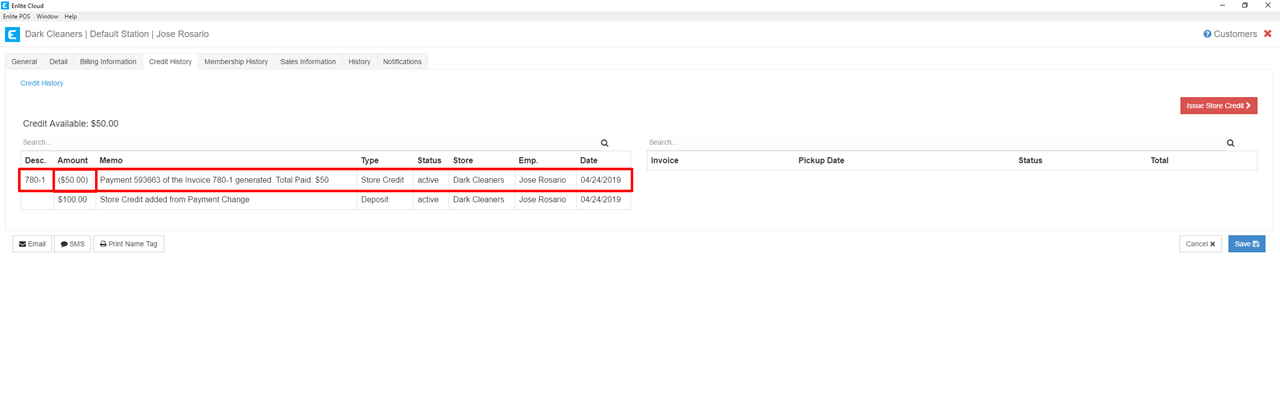
- Applying Available Credit for a Group of Customers
The second way to apply for credit as payment for invoices from the Billing section, allows you to do so for multiple customers at once. To do this, you just select the checkbox for the customers you need. We will continue with our example, and so, only Mr. Octavious is checked. Then press the Store Credit button, near the top of the screen (Pic 5.1).
On the following modal, press the Apply Store Credit button (Pic 5.2). For the selected customers, this will apply all their available store credit, up to the amount they owe. So if a customer has $50 in credit, but owes a balance of $30, it will apply $30 worth of credit to pay off that balance. If like in our example, the customer has $50 in credit, with a balance greater than $50, it will apply the entire credit amount and the remaining balance will remain open.
After the payments are applied, the balances are recalculated and the remaining $50 of Mr. Octavious’ original $100 credit has been applied to his $150 balance and now he only owes $100 and has no available credit remaining (Pic 5.3). You can view the payments in the same manner as illustrated in step 4.
Pic 5.1
Pic 5.2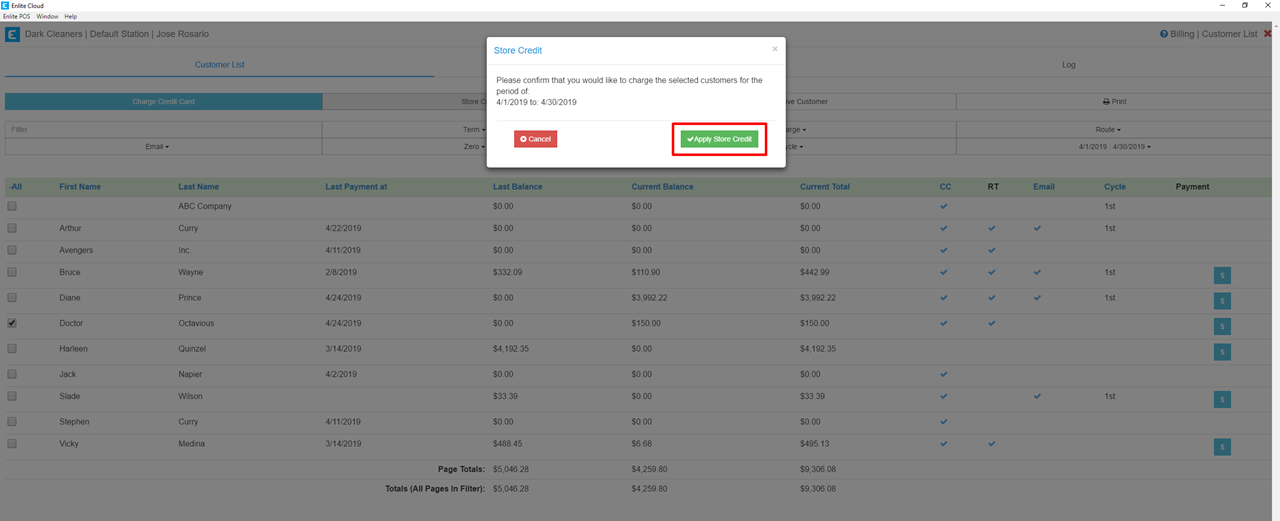
Pic 5.3