Follow these steps to create a Pricing Level
1. Go to Back Office
From the Main Menu select the Office button and enter your Employee Pin when prompted.

2. Item & Price
Select Item & Price from the Back Office Menu

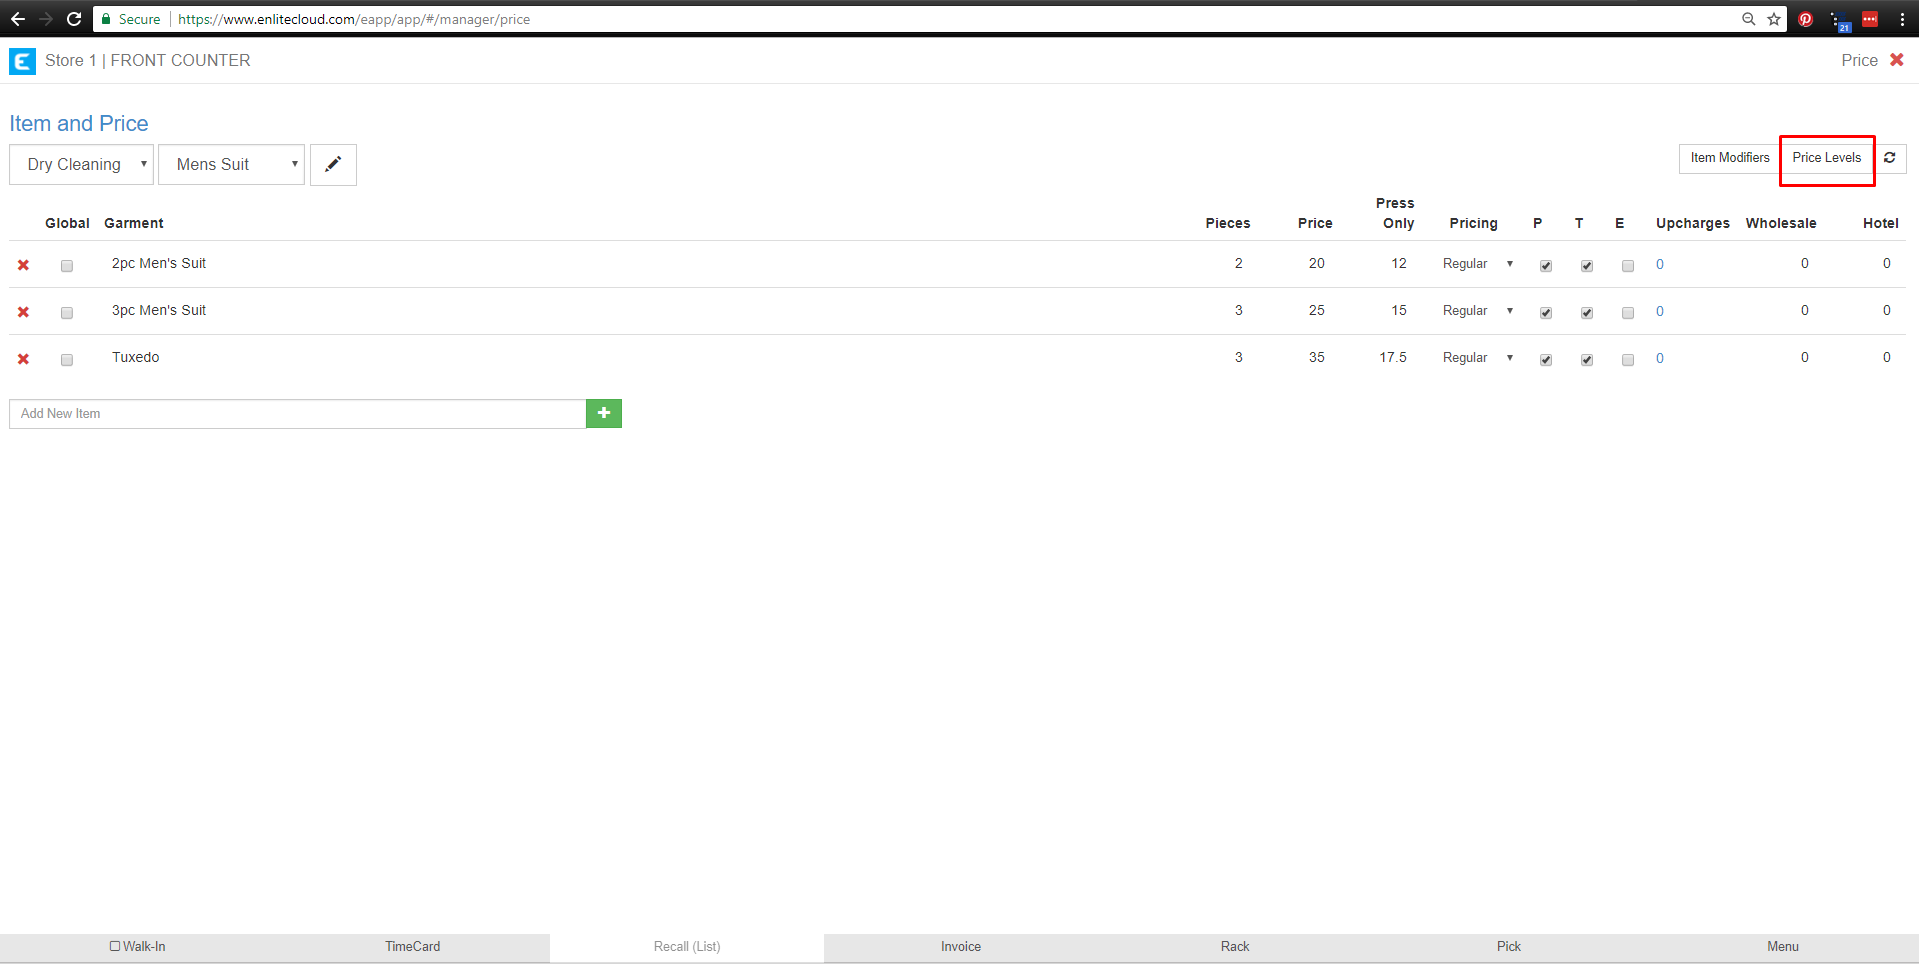
3. Select Price Levels
Press the Price Levels button in the upper-right portion of the page.
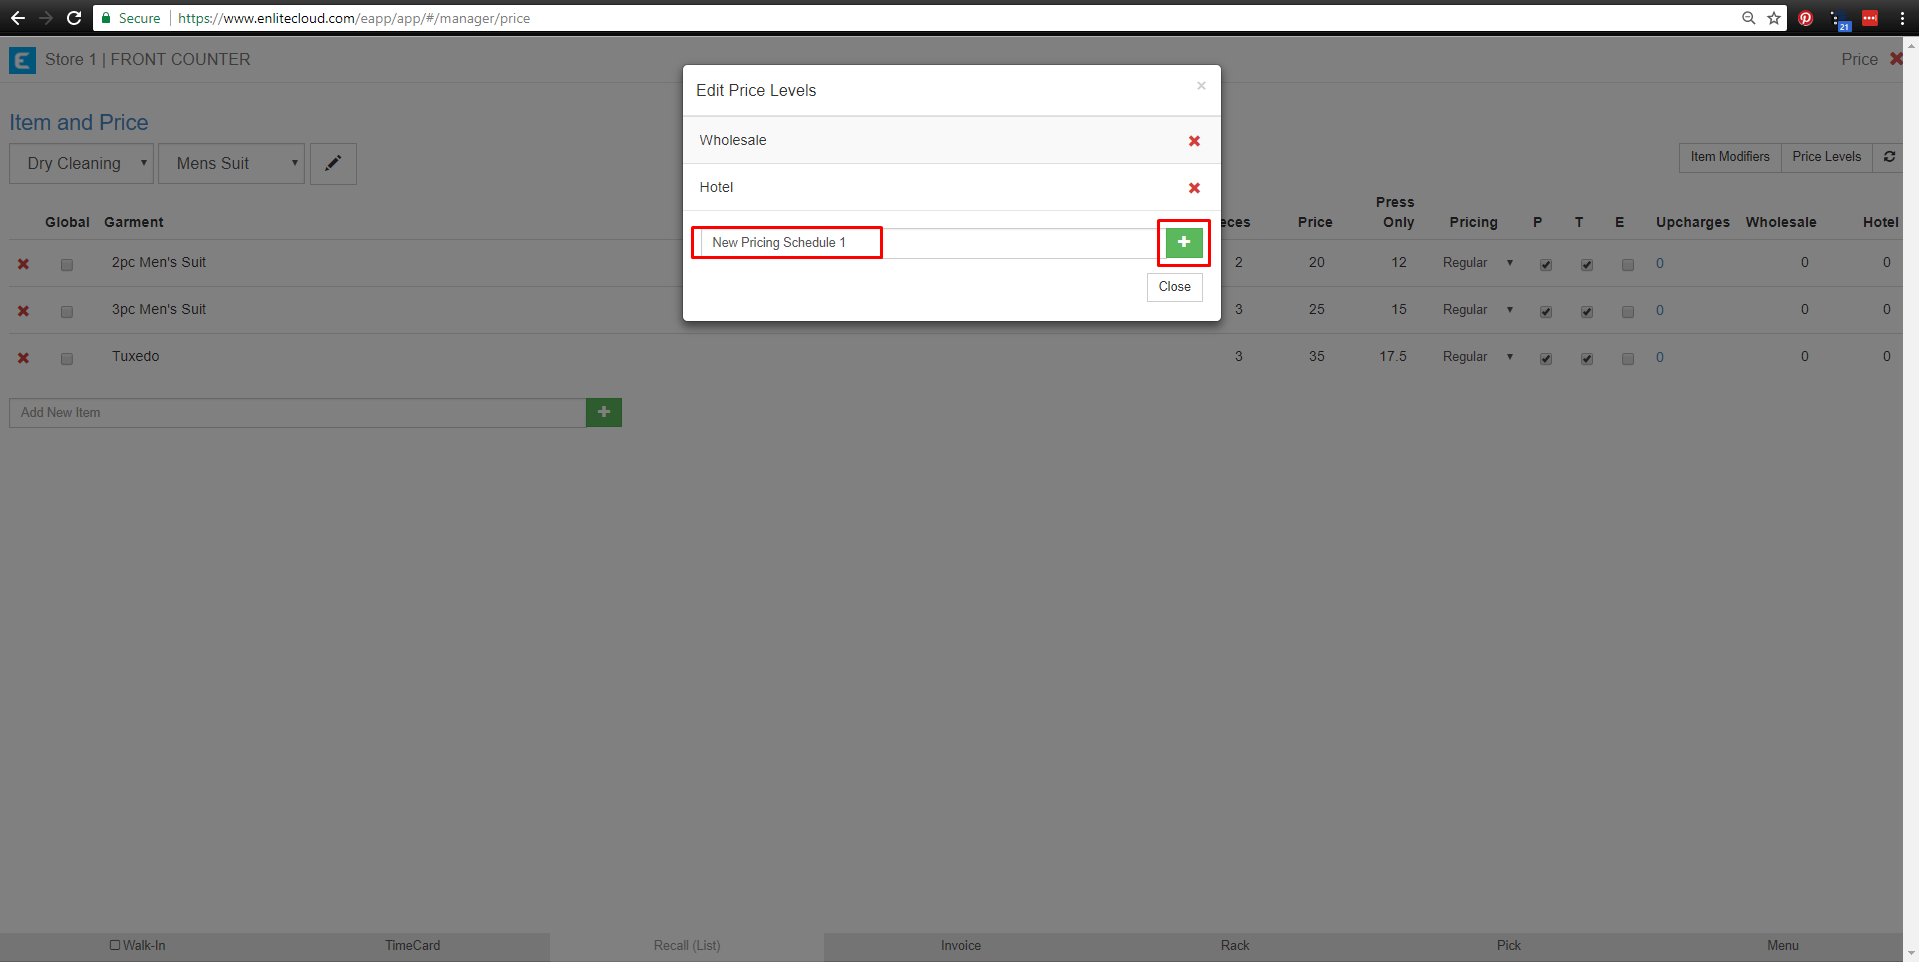
4. Edit Price Levels
Enter the name of your Pricing Level and then click or touch the green plus button
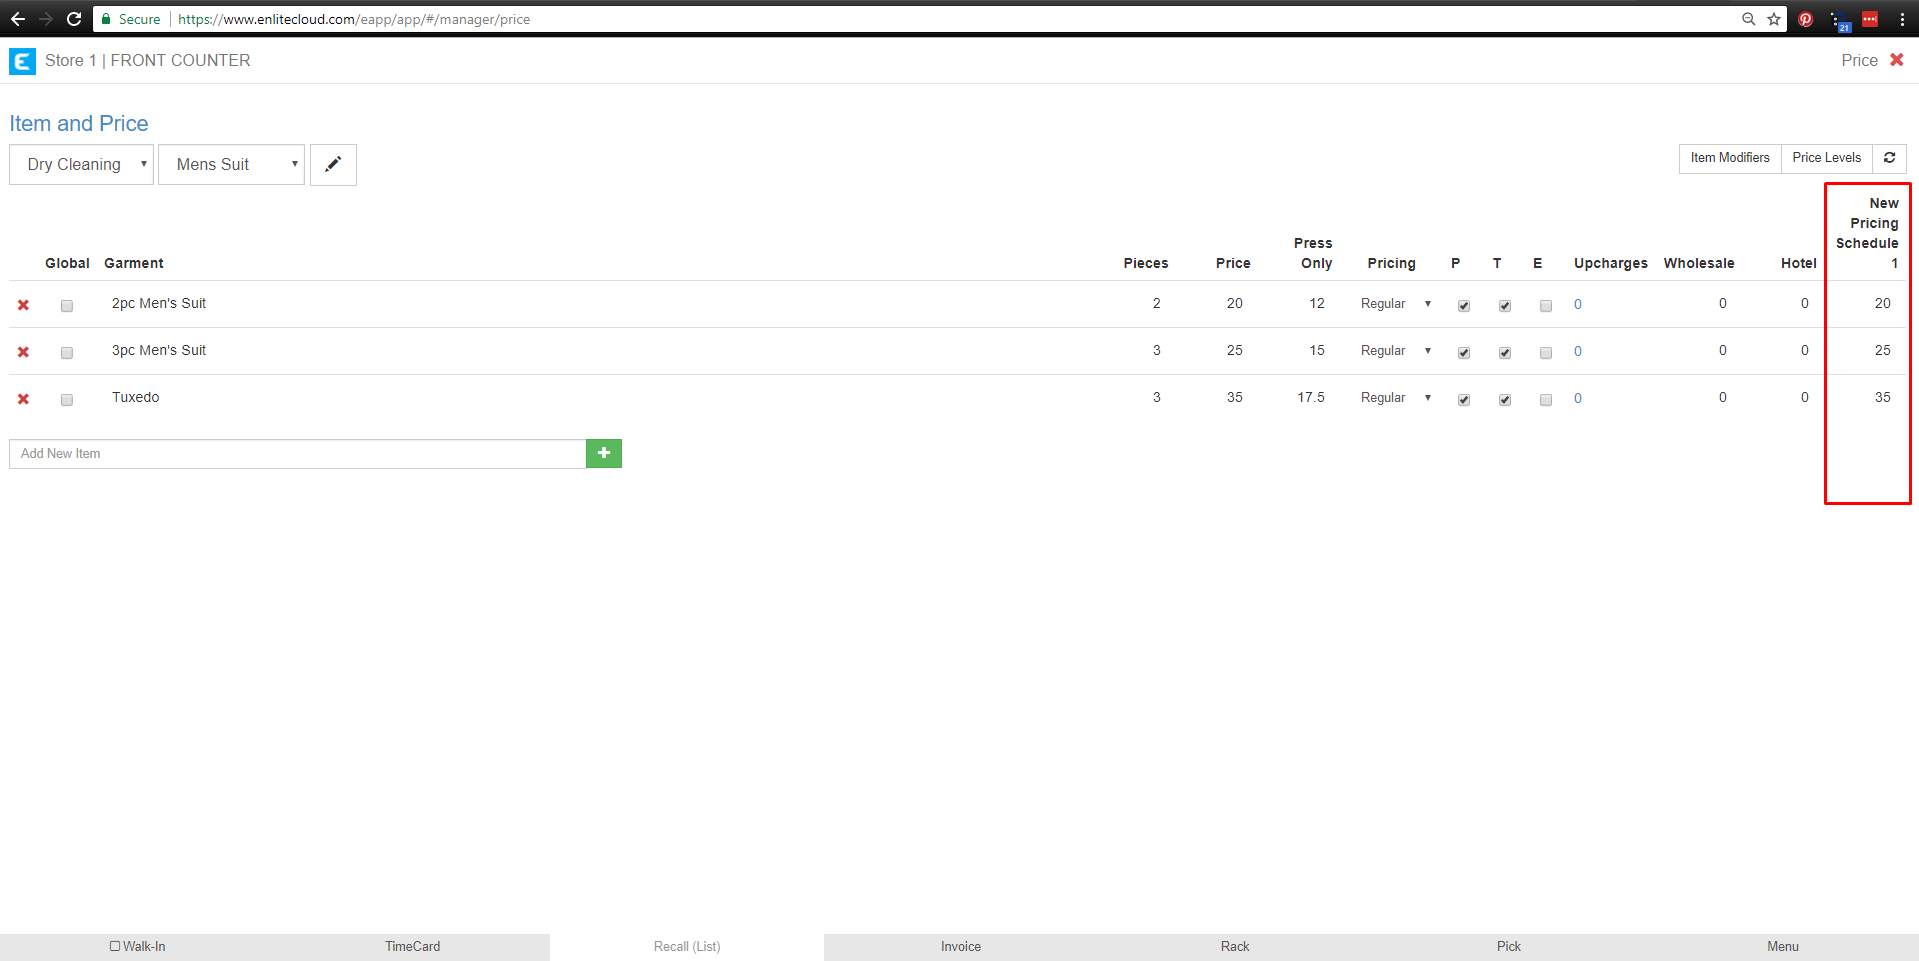
5. View New Price Level
The new price level will appear as a column on the far right. Now you can enter the prices on the items for that list, just by clicking on them and entering new values for them.
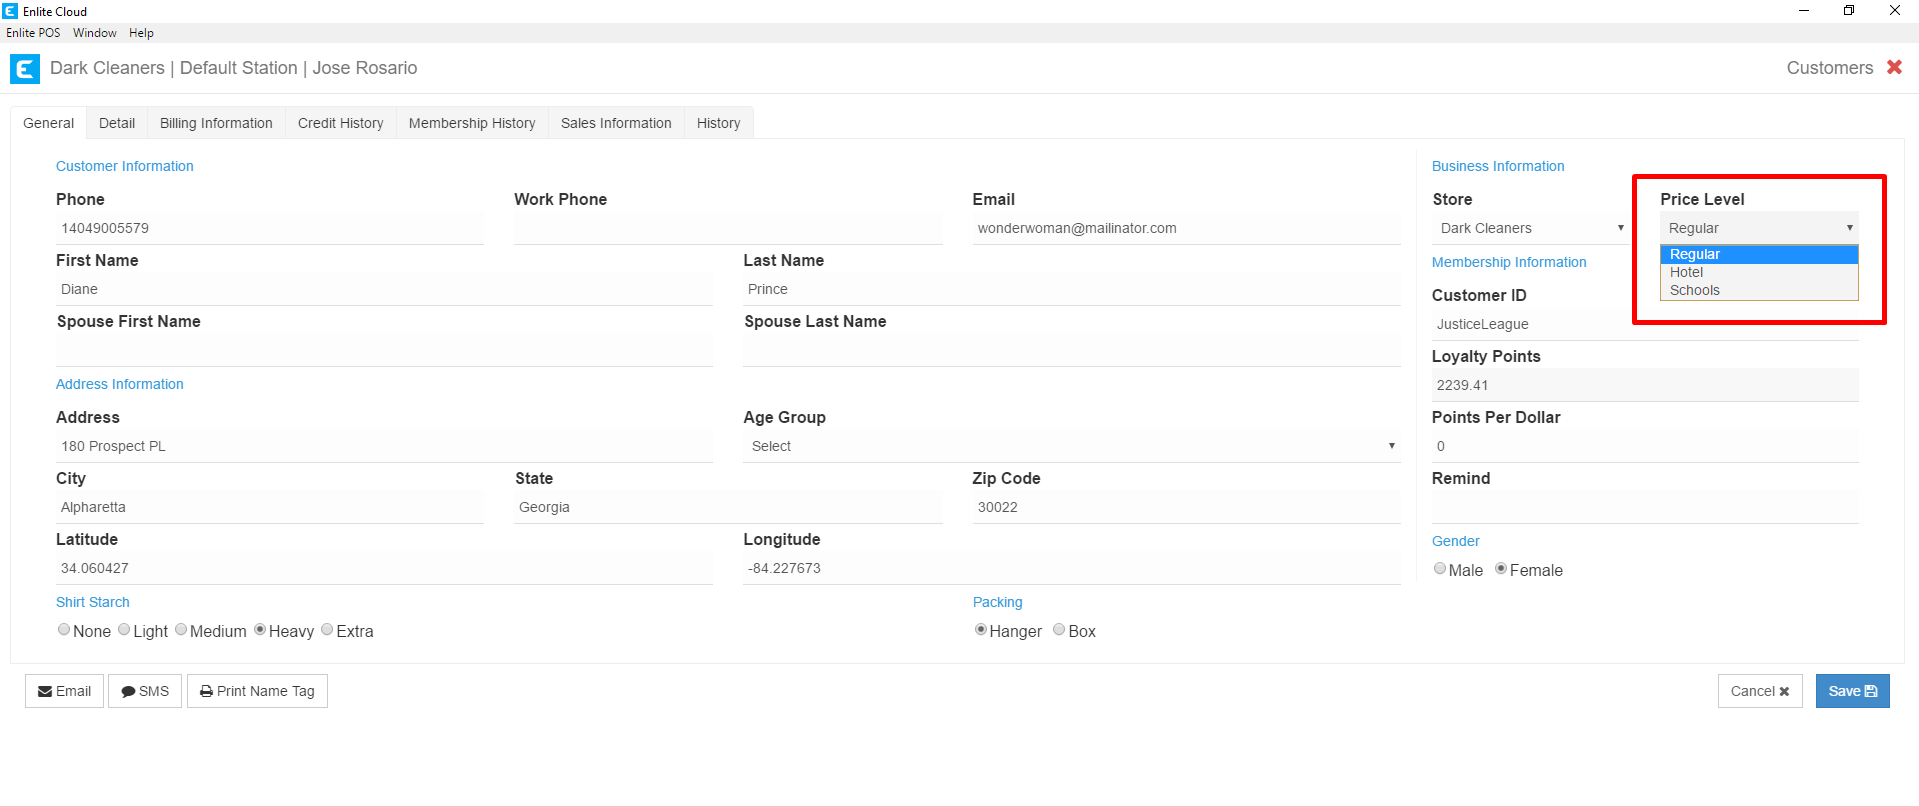
6. Assign Customers to the Price Level
Customers can be assigned to a pricing level by going to the Customer Information section. In the General Tab, you will see the Price Level drop-down on the right side of the screen. All price levels created in the Item & Price section will appear here. Simply select the desired Price Level and hit the save button to commit your changes.