The Enlite Inventory module helps track inventory for products your operation might sell, for example, detergents, chocolate bars, sodas, etc. Enlite allows tracking inventory volumes, sending notifications when restock amounts are reached or when stock is depleted, as well as adding these items to orders by scanning SKUs or UPC codes.
This module requires configuration and is not available by default. If you wish to make use of it, please contact support@darkpos.com so they may assist you with the initial setup.
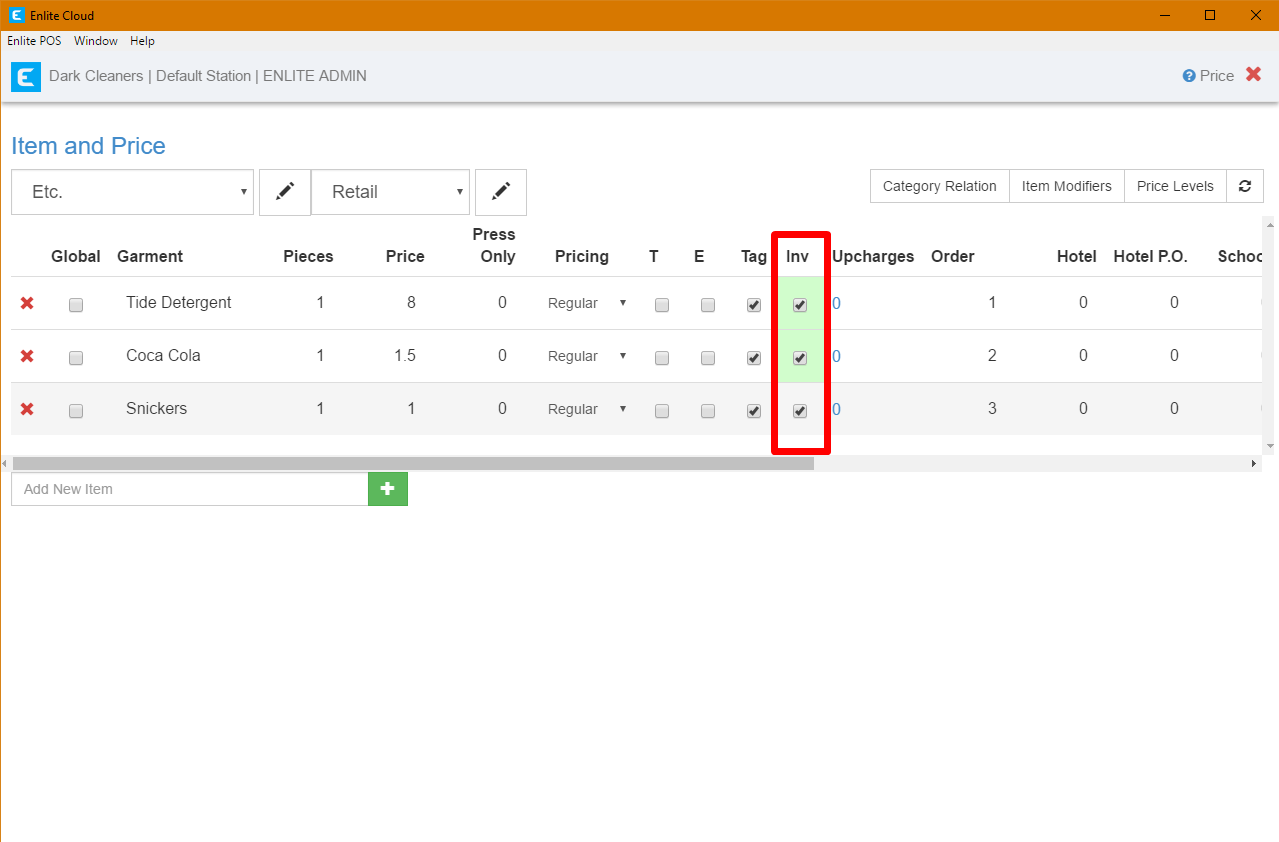
1. Once the module has been enabled, head to the Item & Price section of the in the Office section.
2. In Item & Price navigate to the items for which you want to track inventory. There will be an “Inv” column of checkboxes visible, simply click the checkboxes to add them to the Inventory module. The ”Inv” column will only be visible if the Inventory module has been enabled in your system. If you do not see this column, contact Support.
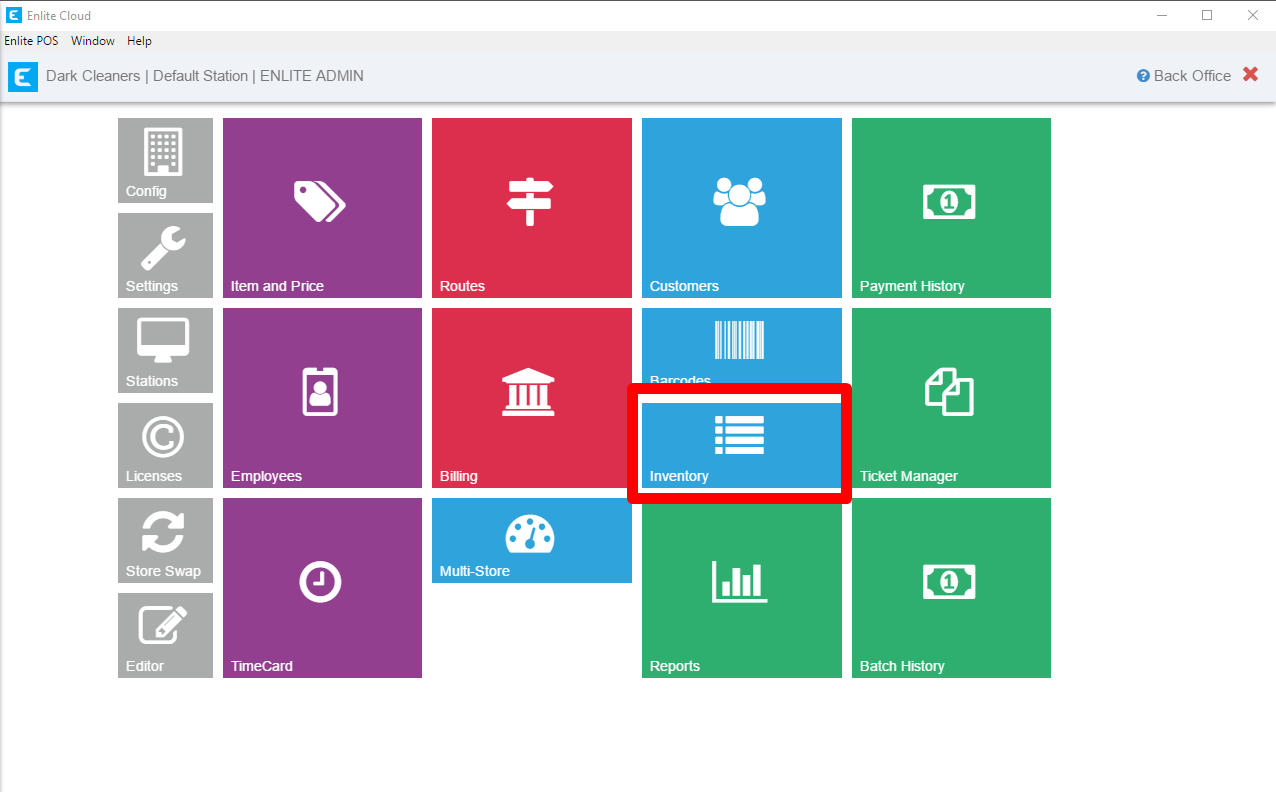
3. From the Office menu, select the Inventory button. The Inventory button will only be visible if the Inventory module has been enabled in your system. If you do not see this column, contact Support.
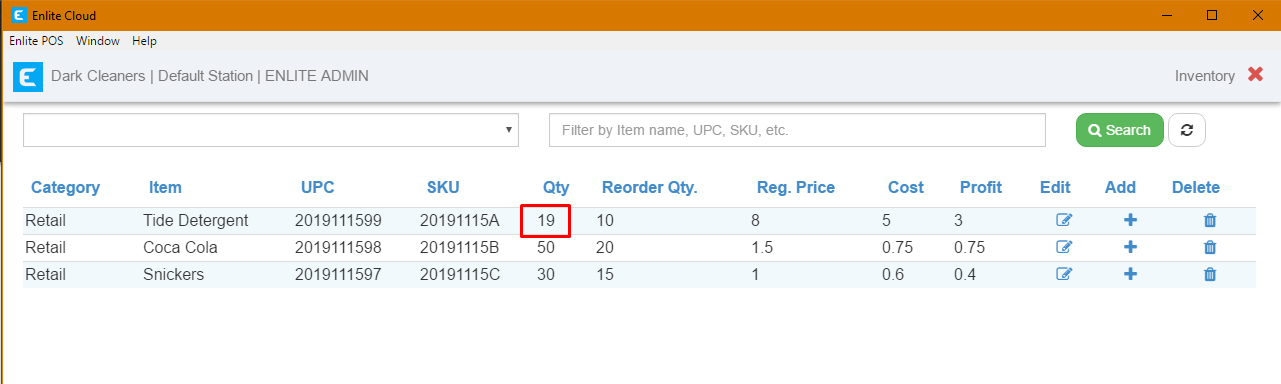
4. The inventory module screen has several elements:
- Category Filter – If you selected products from multiple categories in the Item & Price section, they will all be displayed in this drop-down and you can filter to each to make it easier to find the products you want to work with.
- Name/UPC/SKU Filter – This text field allows you to type the name of a product, a UPC code or a SKU to filter to the product you want to work with.
- Products Table:
- Category – The Category the Product belongs to in the Item & Price section.
- Item – The name of the Product
- UPC – The UPC code for the product
- SKU – The SKU code assigned to the product
- Qty – The current quantity in stock for the product
- Reorder Qty. – The quantity at which the product should be reordered
- Reg. Price – The regular price for the product as set in the Item & Price section. Please note that products do support additional price levels, the same way that Dry Cleaning and Laundry items do. However, in the Inventory module, only the regular price will be displayed.
- Cost – The cost per unit for the product
- Profit – Calculated as the difference between the Reg. Price and the Cost for that product. Please note that in this module, this field will always be based on the regular price, ignoring other price levels
- Edit – Allows you to edit product attributes such as UPC, SKU, Reorder Quantity, etc. See step 5 of this article for details.
- Add – Allows adding additional stock for the selected product
- Delete – Removes the product from the Inventory module. Essentially, removing the checkbox that was selected in the Item & Price section in Step 2 of this article.

5. Clicking the Edit icon on the Product table above, opens the Edit Product modal. It allows you to enter the information that is shown on in the Product Table described in step 4 of this article. While all the fields are optional, Enlite cannot track costs and reorder quantities unless values are entered for those fields.
IMPORTANT: The SKU field is the one that will be used to identify products when they are scanned while detailing an invoice. The UPC field is only for informational purposes. If you use the UPC when scanning products, simply scan that value into both the UPC and SKU fields. If you use your own SKU code when scanning products, scan that code into the SKU field.

6. Clicking the Add icon on the Product Table, opens the Manage Stock modal. It allows you to add or subtract to your stock based on your inventory movements.
- Order Date/Time – This will be the Date/Time the system uses to record the order
- Order Num. – Field to record any order number you want to associate with the entry
- Quantity – The amount that will be added or subtracted (negative numbers) from the stock
- Notes – Any notes you wish to record with the entry

7. Saved entries are displayed in the table below. This Order History section will display the entries made in the last 90 days. Anything older than that must be retrieved from the Reports module.

8. Once the information is entered, Enlite will continue tracking amount in stock based on additional inventory entries or sales of products.

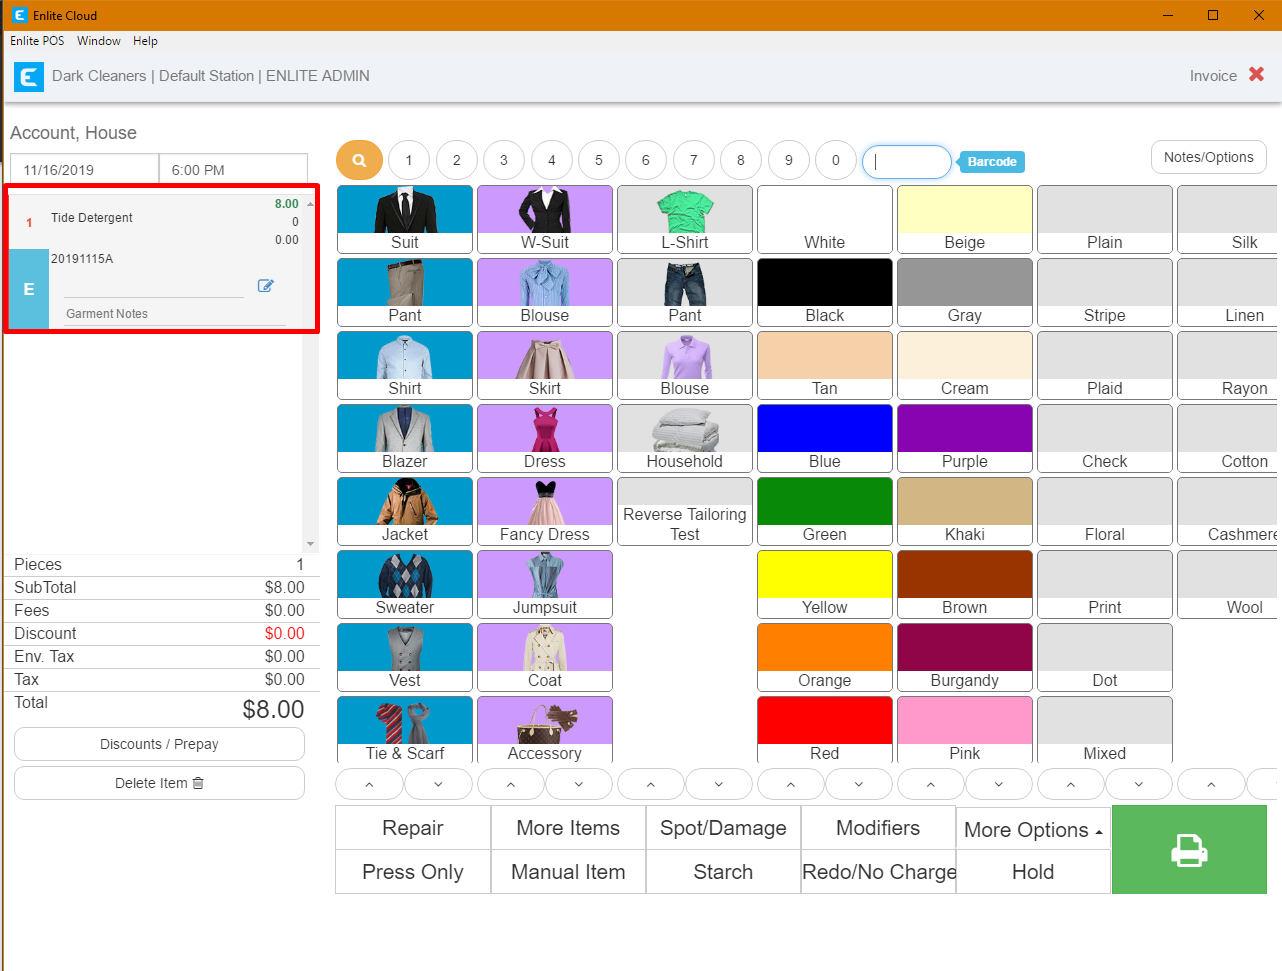
9. To scan barcodes for retail products from the Invoicing screen, simply scan the barcode that was entered in the SKU field. You do this the same way you would scan a heat seal barcode. If the Barcode field is not visible in your Invoicing screen, please contact Support so that they can enable that module.

10. Sales for products are also recorded in the Order History section of the Manage Stock modal, along with the invoice number where they were sold. Enlite will also keep the current quantity of items in the Product Table on the Inventory screen.